🧼 How to Clean a Stainless Steel Sink (and Keep It Sparkling!)🧼
- Feb 12
- 5 min read
Updated: Feb 26
Your stainless steel sink is the centerpiece of your kitchen—it handles everything from washing dishes to rinsing veggies, yet it often gets overlooked when it comes to deep cleaning. Over time, food residue, water spots, soap scum, and even rust can make it look dull or stained. But with the right approach, cleaning your sink can be simple, even satisfying, and leave it gleaming like new! 🌟

Here’s a complete guide to cleaning, deodorizing, and maintaining your stainless steel sink, including the tools and products that will make this task a breeze.
🧰 Tools and Products You’ll Need
Before diving in, gather everything you need—having the right tools makes all the difference. Here’s what I recommend:
Dish soap (I like Dawn) – for breaking down grease and general cleaning
Baking soda – a gentle abrasive for scrubbing without scratching
White vinegar – for deodorizing and tackling mineral buildup
Ice cubes – perfect for refreshing the garbage disposal and grinding away small debris
Non-scratch sponge or brush – prevents scratches while scrubbing
Stainless steel cleaner or polisher (Bar Keepers Friend) – removes stains and restores shine
Microfiber cloths and paper towels – for drying and polishing
💡 Tip: Avoid steel wool or harsh abrasives—they can scratch your sink and create future rust spots.
1️⃣ Clear the Sink and Start Fresh
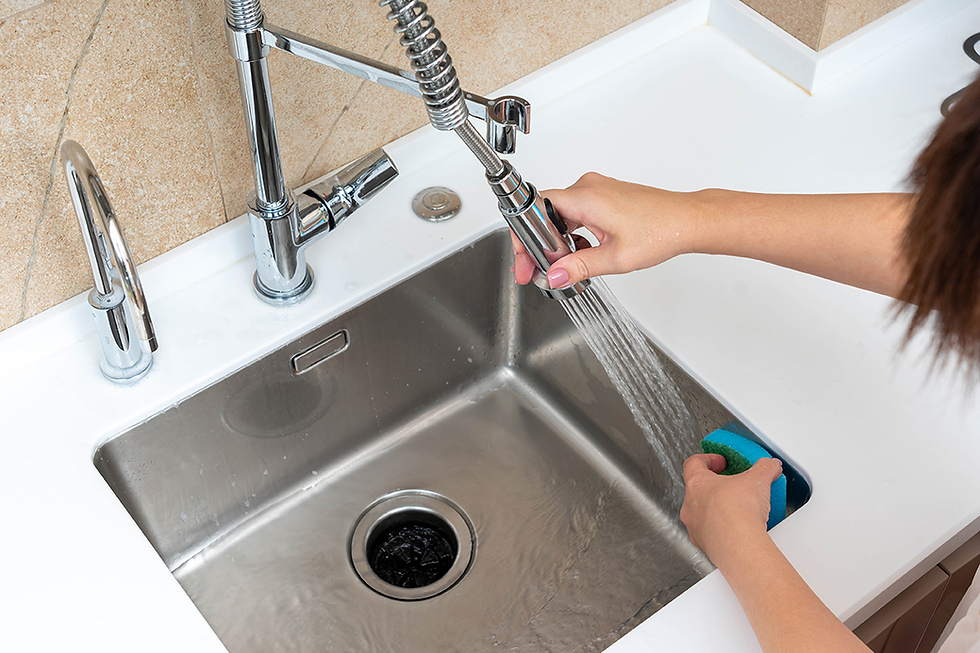
The first step is simple: remove everything from your sink. 🧽 Dishes, utensils, and any leftover food should either be washed, loaded into the dishwasher, or temporarily set aside. A clean sink surface ensures that your cleaning products work effectively and prevents spreading debris around.

If you leave dirty dishes in the sink, the stainless steel cleaner will just sit on top of the mess instead of making your sink shine. Starting with an empty sink is the equivalent of “prepping your canvas” before painting—a little effort upfront goes a long way!
2️⃣ Clean the Garbage Disposal
If your sink has a garbage disposal, this step is key to keeping it odor-free and functioning properly. First, remove any visible gunk or leftover debris. Then, toss in a handful of ice cubes, a splash of white vinegar, and a sprinkle of baking soda.

Optional: add a few drops of lemon juice for a fresh scent.
Run the disposal briefly—this combination helps grind leftover food particles, neutralize odors, and even polish the blades. Afterward, take a small, soft brush to clean around the edges and inside the opening for a thorough clean. 🍋✨
💡 Pro Tip: Doing this once a week keeps your disposal fresh and prevents clogs before they start.
3️⃣ Scrub With Dish Soap
Next, coat the entire sink with dish soap (like Dawn) and scrub thoroughly using a non-scratch sponge. Focus on areas where food often sticks—around the drain, faucet base, and corners. This first scrub is all about removing grease and debris, which ensures that your stainless steel cleaner can do its magic without interference.

For stuck-on residue, you can sprinkle a bit of baking soda directly onto the sponge—it acts as a gentle abrasive without scratching the steel. Think of this as the “foundation cleaning” step that makes your deep-clean shine possible. ✨
4️⃣ Rinse Thoroughly
Once you’ve scrubbed the sink with soap, rinse everything with warm water. A thorough rinse removes any loose debris and leftover soap. This ensures that the stainless steel cleaner you apply next will work on the bare metal surface, not a layer of soap residue.
5️⃣ Apply Stainless Steel Cleaner
Now for the fun part! Sprinkle or spray stainless steel cleaner (Bar Keepers Friend) over the sink, faucet, handles, and any other metal fixtures. Use your soft sponge or small brush to scrub the entire surface. Small brushes are perfect for tight areas around handles and faucet edges.

💡 Example: I like to spend extra time around the faucet base, where mineral deposits and soap scum tend to build up. A little elbow grease here goes a long way.
6️⃣ Let It Sit and Work Its Magic
Let the cleaner sit for about 10 minutes. This is a perfect time to clean another area of your kitchen, like wiping down counters or loading the dishwasher. The cleaner will tackle stubborn stains, rust spots, and buildup while you multitask. 🕒
7️⃣ Rinse and Dry
Rinse the sink thoroughly with warm water to remove all traces of the cleaner. Then dry the sink completely using a microfiber cloth or paper towels. Drying is essential—it prevents water spots and helps the cleaner leave a protective shine.
💡 Tip: Always dry in the direction of the stainless steel grain. It gives the sink a professional, streak-free look.
8️⃣ Polish the Sink and Fixtures
For that final “wow” factor, apply a small amount of stainless steel polish (Bar Keepers Friend works perfectly) and use a cloth or paper towel to buff the sink and fixtures. Less is more here—a little polish goes a long way, giving your sink a mirror-like shine.

🧼 How to Get Rid of and Prevent Smells
Smells in a stainless steel sink often come from leftover food debris or your garbage disposal. My favorite trick:
Pour ½ cup of baking soda down the drain
Follow with 1 cup of white vinegar and let it fizz for a few minutes
Toss in a handful of ice cubes and run the disposal
Optional: add lemon juice for freshness

For sinks without disposals—or even as an extra step—I recommend using a drain food catcher. This simple tool catches leftover particles, preventing them from getting trapped and causing odors. 🍋✨
💡 Daily prevention tip: rinse your sink after each use and wipe it dry. This keeps debris from sitting too long and stops smells before they start.
🗓️ How Often Should You Clean Your Stainless Steel Sink?
Quick daily wipe: Rinse and wipe with dish soap and a sponge to prevent buildup
Weekly deep clean: Follow all the steps above for a sparkling sink
After heavy use: Clean immediately after big meals or messy prep to avoid stains and odors
Consistency keeps your sink looking and smelling fresh without requiring hours of work.
🧴 Commercial Cleaners: Yes or No?
Yes, you can use commercial cleaners—but make sure they’re safe for stainless steel. I love Bar Keepers Friend because it’s effective, gentle, and widely available. Avoid abrasive cleaners or anything containing bleach—they can scratch or discolor your sink. Always check the label for compatibility if you’re trying a new product.
🛑 Rust Spots? No Problem!
Rust usually comes from leaving metal items in the sink for too long—think steel wool pads, pots, or pans. To remove rust:

Sprinkle a small amount of Bar Keepers Friend or baking soda on the spot
Add a drop of water to make a paste
Gently scrub with a soft sponge
Rinse thoroughly and dry
Prevent rust by drying your sink after every use and avoiding prolonged contact with metal objects. 🛡️
💦 Prevent Water Spots
Water spots happen when minerals dry on the surface. Prevention is easy:

Always dry your sink after rinsing with a microfiber cloth
Polish weekly with a stainless steel cleaner
Make sure every surface is dry after cleaning—this makes it harder for minerals to stick
With this simple habit, your sink will stay streak-free and shiny for weeks. ✨
Final Thoughts
Cleaning a stainless steel sink may sound like a chore, but with the right products and routine, it’s simple, effective, and even a little satisfying. By combining dish soap, baking soda, white vinegar, and a quality stainless steel cleaner, you can remove buildup, eliminate odors, and prevent water spots and rust.
A sparkling sink doesn’t just look beautiful—it also keeps your kitchen cleaner, healthier, and more enjoyable to cook and clean in. 🧼💖
💫 Until next time,


Comments